DDEV is a powerful open-source tool that makes it easy to set up PHP development environments. In this guide, we’ll walk through the process of installing Drupal 11.1 using DDEV, creating a perfect local development environment for your Drupal projects.
Prerequisites
Before we begin, ensure you have:
- Basic comfort with command-line terminal operations
- Sufficient system privileges to install software
- Any Docker clinet like Docker Desktop (for Windows/Mac) or Docker Engine (for Linux)
- Git
Step 1: Install DDEV
If you haven’t already installed DDEV, follow these installation commands based on your operating system:
For macOS (using Homebrew):
brew install ddev/ddev/ddev
For Linux:
curl -LO https://raw.githubusercontent.com/ddev/ddev/master/scripts/install_ddev.sh
bash install_ddev.sh
For Windows, use Chocolatey:
choco install ddev
Step 2: Create Project Directory
Create a new directory for your Drupal project and navigate to it:
mkdir d11-last
cd d11-last
Step 3: Initialize DDEV Project
Initialize a new DDEV project with Drupal configuration:
ddev config --project-type=drupal --php-version=8.4 --docroot=web
Step 4: Install Drupal using Composer
Start DDEV and use Composer to create a new Drupal project:
ddev start
ddev composer create drupal/recommended-project
Step 5: Install Drush
Install Drush for command-line management:
ddev composer require drush/drush
Step 6: Install Drupal
You can install Drupal using Drush with either default or custom credentials:
Default installation:
ddev drush site:install -y
Custom administrator credentials:
ddev drush site:install --account-name=admin --account-pass=admin -y
Step 7: Additional Configuration
Access Your Site
Launch your new Drupal site:
ddev launch
Generate a one-time login link for the administrator account:
ddev drush user:login
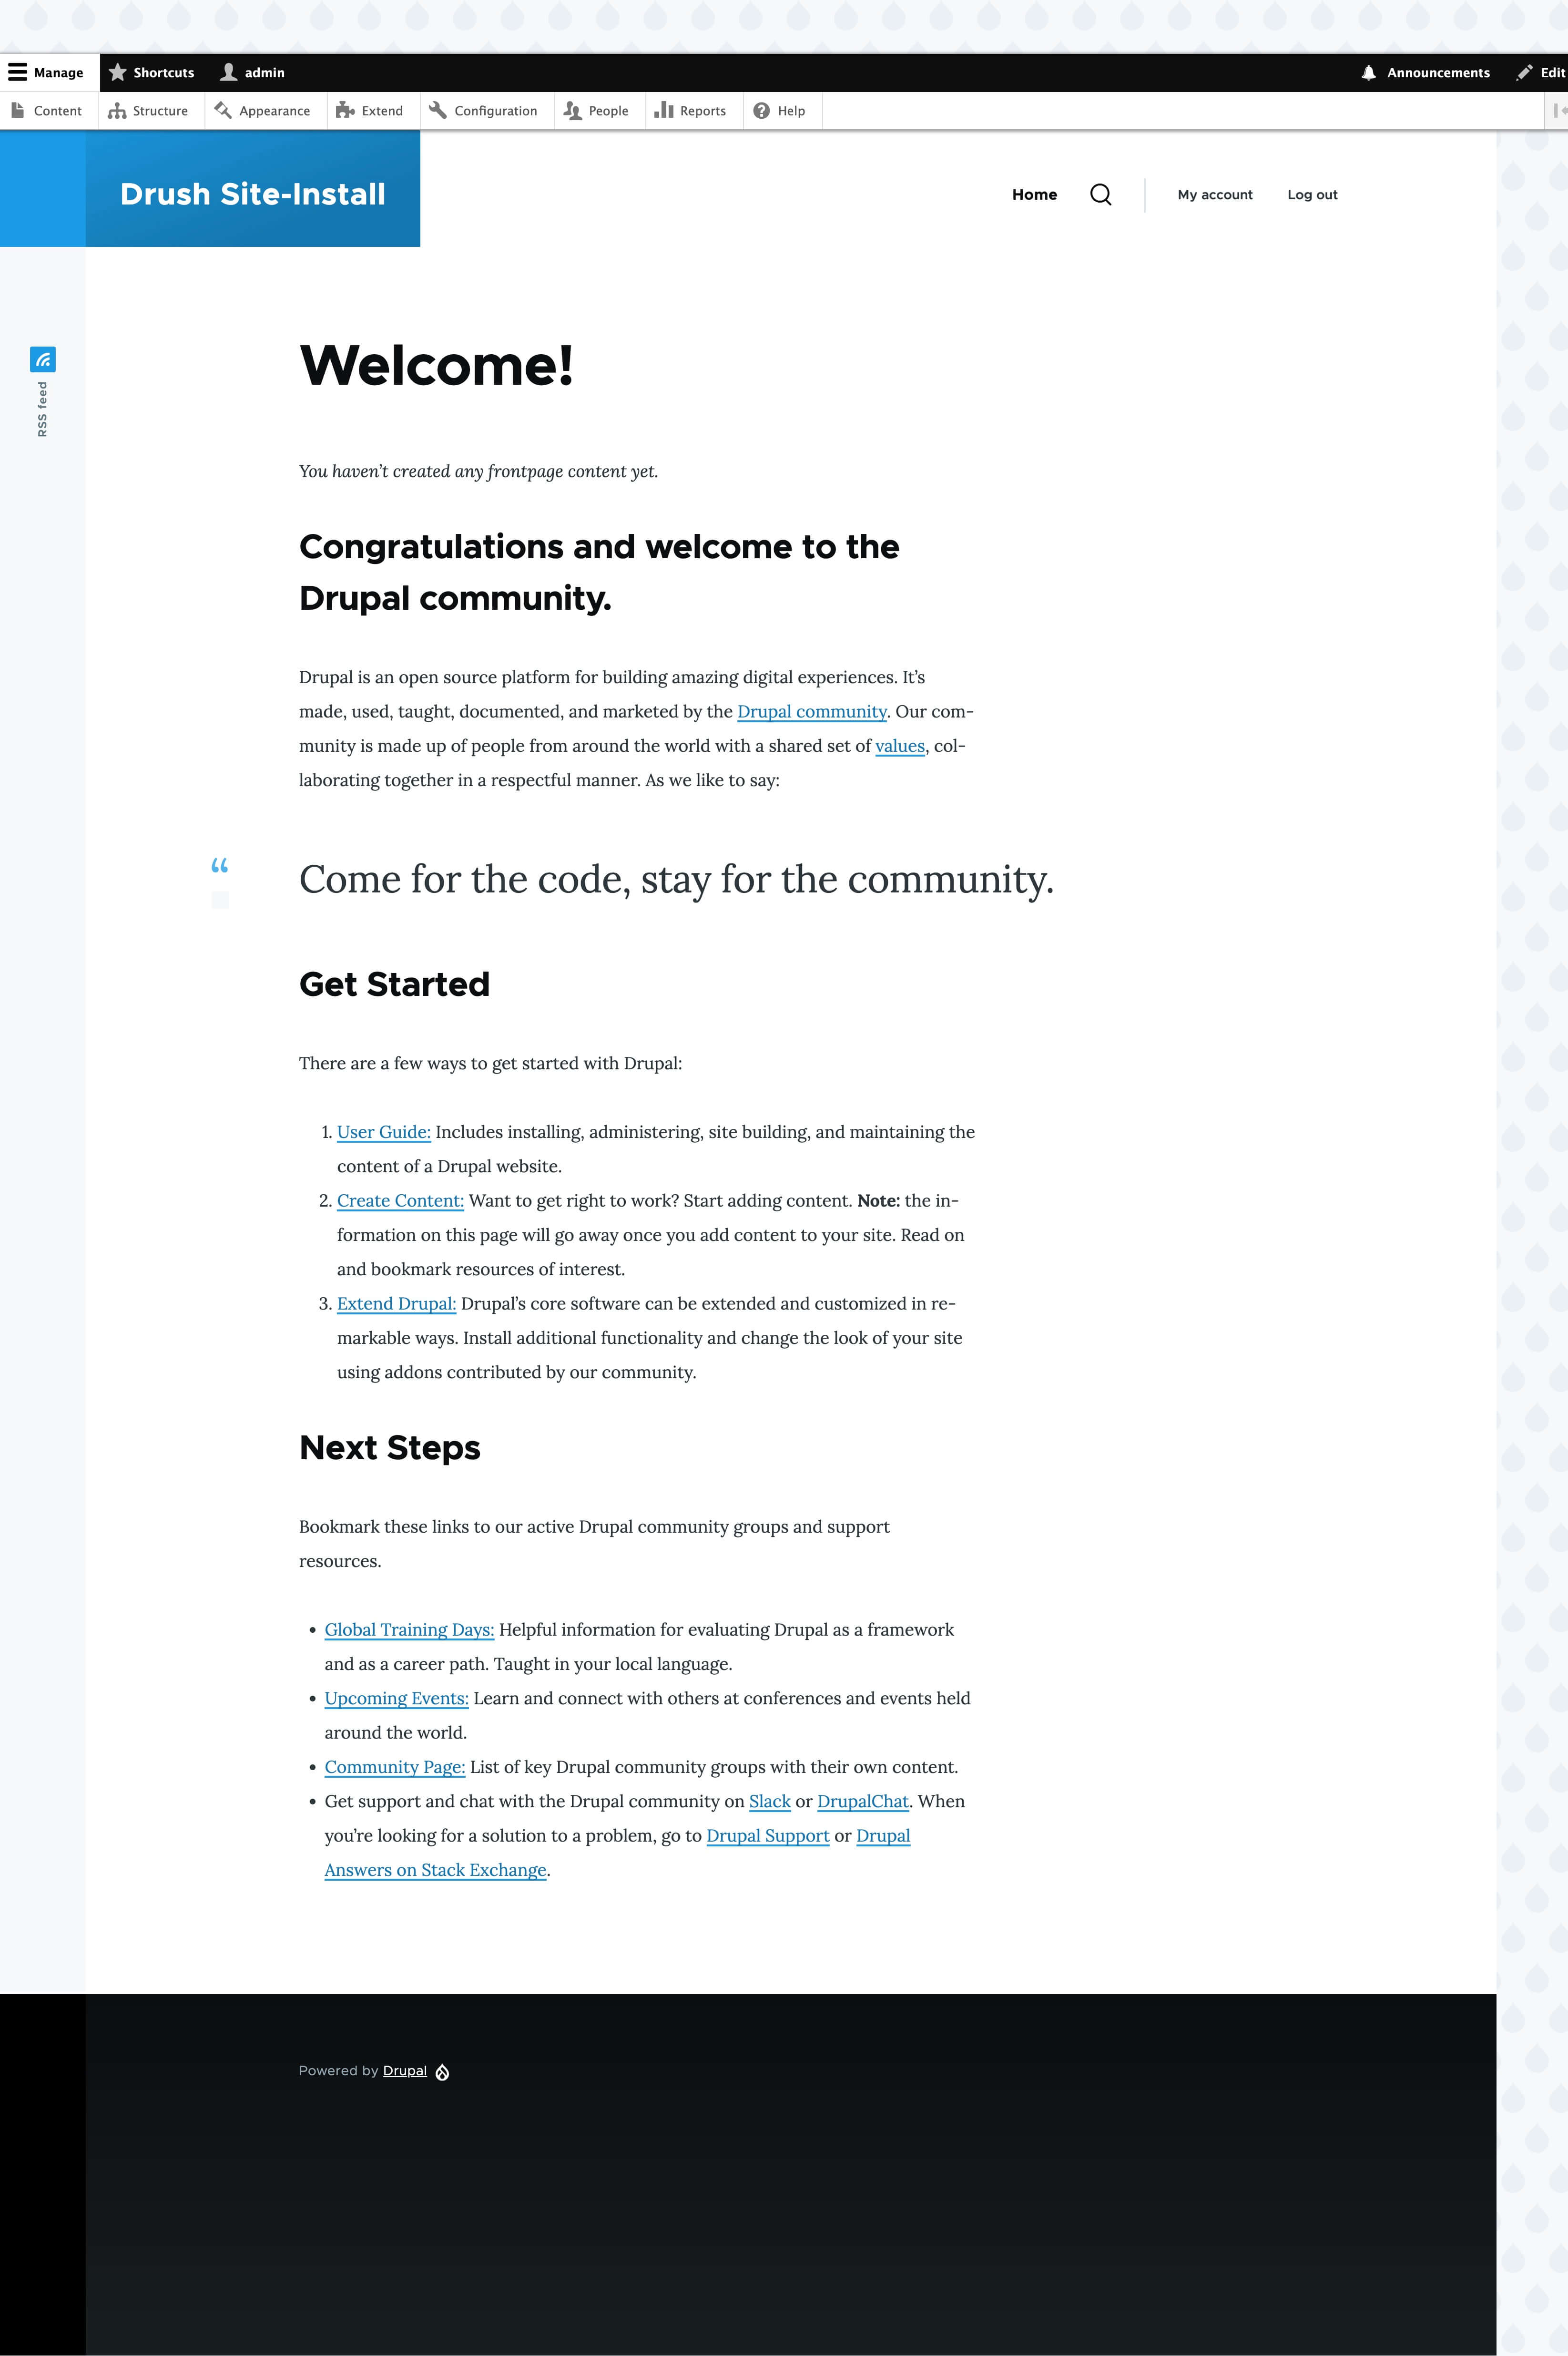
The local site should be look like this:
Common DDEV Commands
Here are some useful DDEV commands for managing your environment:
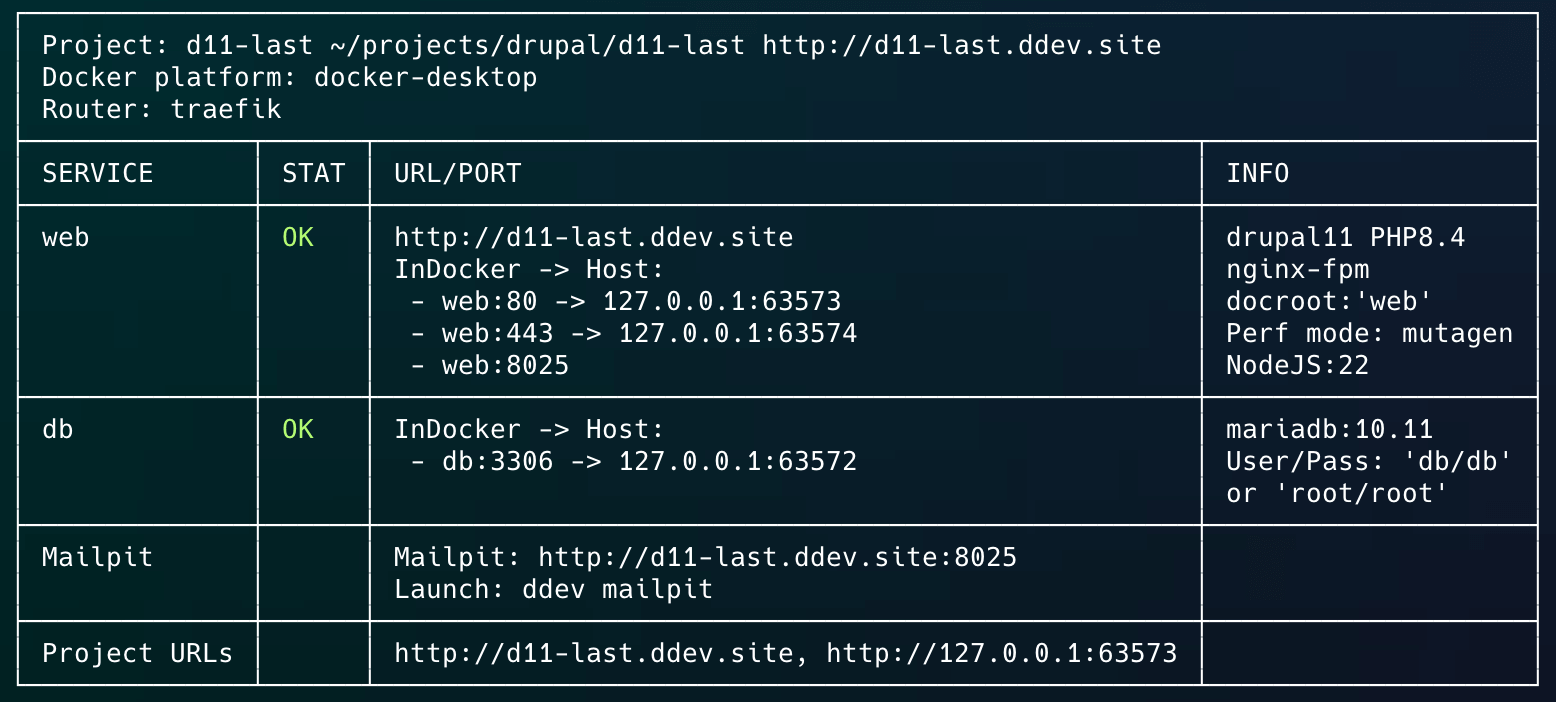
For instance, describe command shows project information
ddev describe
ddev logs # View logs
ddev ssh # SSH into container
ddev import-db # Import database
ddev export-db # Export database
ddev drush cr # Clear cache
ddev stop # Stop environment
Always, you can run the help command to see more: ddev --help.
Troubleshooting
Common Issues and Solutions
-
Database Connection Issues
- Verify DDEV is running:
ddev status - Check database credentials in
settings.ddev.php - Restart DDEV:
ddev restart
- Verify DDEV is running:
-
Permission Issues
- Reset file permissions:
ddev auth ssh - Fix Drupal files directory:
ddev exec chmod -R 755 web/sites/default/files
- Reset file permissions:
-
Composer Memory Issues
- Increase PHP memory limit:
ddev config --php-version=8.4 --php-memory-limit=4G
- Increase PHP memory limit:
Conclusion
You now have a fully functional Drupal 11.1 development environment using DDEV. This setup provides a consistent, Docker-based environment that’s perfect for Drupal development. Remember to check DDEV’s documentation for more advanced features and configurations.